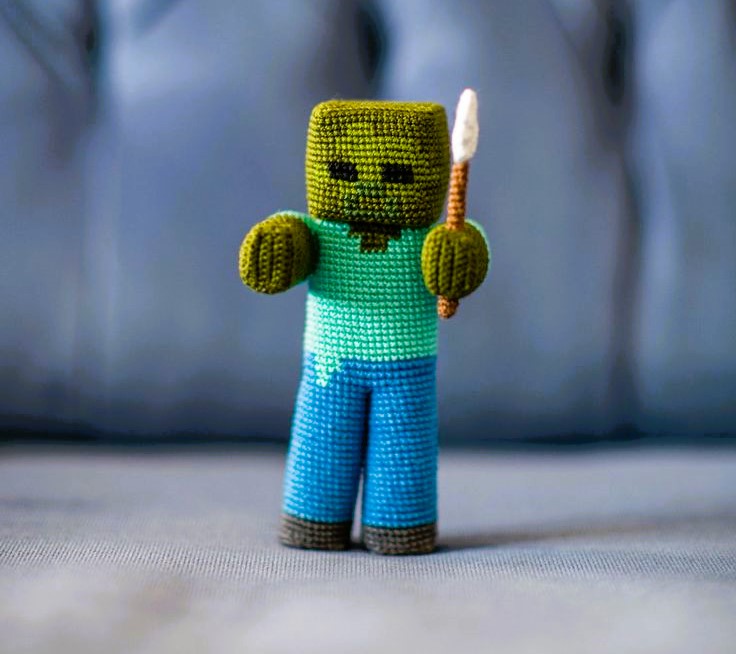
Creating a Zombie from Minecraft: A Step-by-Step Tutorial
Minecraft, the iconic sandbox game, has brought to life an array of memorable characters, and one of the most recognizable and formidable among them is the Zombie. With its blocky appearance and relentless pursuit of players, the Minecraft Zombie has become an iconic part of the game. In this step-by-step tutorial, we’ll guide you through the process of creating your very own Minecraft Zombie, both as a tribute to the game and a fun crafting project.
Materials You’ll Need
Before we begin, gather the following materials:
- Green knitting yarn
- Black knitting yarn
- White knitting yarn
- Knitting needles
- Scissors
- Stuffing material
- Needle and thread
Step 1: Knitting the Zombie’s Body
1.1. Start with green yarn to create the Zombie’s body. Begin by casting on stitches on your knitting needles. The number of stitches will determine the size of your Zombie.
1.2. Follow your chosen pattern for the Zombie’s body, knitting each row according to the design. Remember to leave gaps where you’ll later attach the Zombie’s facial features.
Step 2: Crafting the Zombie’s Head
2.1. To make the Zombie’s head, switch to the black yarn. Cast on stitches for the head and follow the pattern, knitting in the round.
2.2. When you’ve completed the head, stuff it with the stuffing material to give it a three-dimensional shape.
Step 3: Creating the Zombie’s Face
3.1. Use white yarn to craft the Zombie’s face. This includes its eyes, nose, and mouth. You can sew these elements onto the black head using a needle and thread.
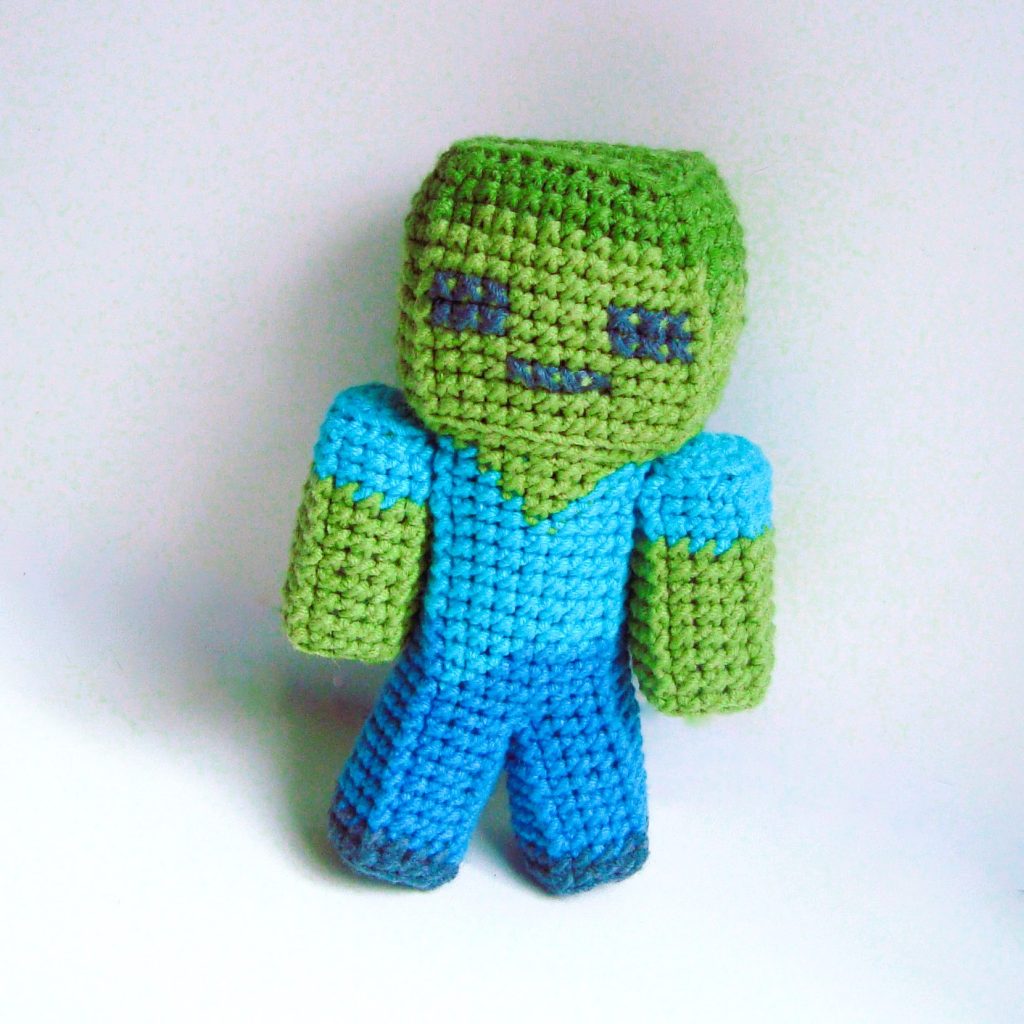
3.2. Zombies in Minecraft have an iconic look with square-shaped eyes and a stitched mouth. Be sure to replicate these features in your knitting.
Step 4: Adding Arms and Legs
4.1. Craft the Zombie’s arms and legs using green yarn. These should be relatively thin compared to the body. Do you like the article? Read also about Pixel Art Extravaganza.
4.2. Attach the arms and legs to the body, sewing them securely in place. You can use the same green yarn or a matching thread color.
Step 5: Final Touches
5.1. Give your Zombie some personality by adding details like a darker shade of green to create shading effects. This can be done using a contrasting yarn color or embroidery thread.
5.2. Secure any loose ends and trim excess yarn.
Conclusion
Congratulations! You’ve successfully created your own Minecraft Zombie through the art of knitting. This project not only pays homage to the beloved game but also allows you to express your creativity in a unique way.
For more Minecraft-related crafting inspiration and resources, consider visiting Minecraft Wiki. These platforms offer a wealth of information about the game’s characters, including the Zombie, and can provide additional ideas for your crafting endeavors.
Now, proudly display your handcrafted Zombie, whether as a decoration, a gift, or a token of your Minecraft fandom. Happy crafting, and may your adventures in both the digital and real Minecraft worlds continue!