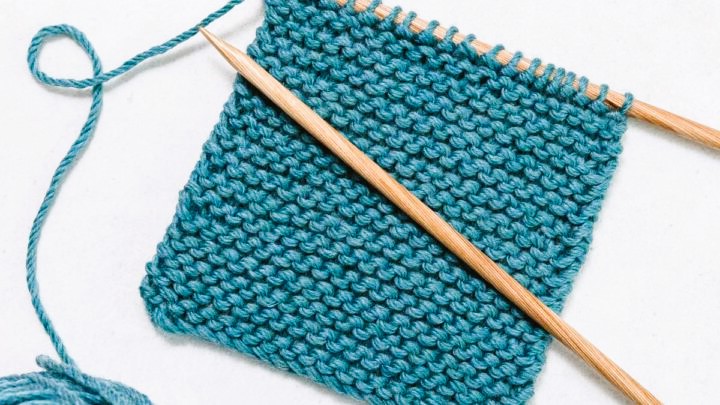
Knitting Basics: Let’s Start with the First Steps
Knitting, the age-old craft of creating fabric from yarn using needles, has a timeless appeal. It’s a versatile and rewarding hobby that allows you to craft clothing, accessories, and home decor items while simultaneously relaxing and unleashing your creativity. If you’re new to knitting, don’t be intimidated—getting started with the basics is easier than you might think. In this guide, we’ll take you through the fundamental steps of knitting, so you can embark on your knitting journey with confidence.
Materials You’ll Need:
Before you start knitting, gather the essential materials:
- Yarn: Choose a yarn that suits your project. Yarn comes in various fibers, colors, and weights. For beginners, a medium-weight yarn (worsted) in a light color is a good choice.
- Knitting Needles: Knitting needles come in different sizes, indicated by a number. The size you need depends on your yarn and the desired fabric tension. Most beginners start with a pair of size 8 or 9 needles.
- Scissors: For cutting yarn and finishing your project.
- Yarn Needle: A large, blunt-ended needle used for sewing up seams and weaving in loose ends.
- A Simple Pattern: Start with a basic knitting pattern or follow along with online tutorials to practice your knitting skills.
Step 1: Casting On
Casting on is the first step in knitting, creating the foundation row of stitches. Here’s a common method for casting on:
- Make a Slip Knot: Leave a tail of yarn and make a loop with the yarn, crossing it over the tail. Pass the end of the yarn through the loop and tighten it to create a slip knot.
- Insert Needle: Insert one of your knitting needles into the slip knot and hold it in your right hand.
- Tension Yarn: Hold the working yarn (the yarn attached to the ball) in your left hand, leaving a tail of a few inches. Use your right hand to hold the needle with the slip knot and the yarn.
- Wrap Yarn: Bring the yarn behind the needle in your right hand and then loop it over the needle from back to front.
- Pull Through: Use the needle to pull the loop of yarn through the slip knot. You’ve created your first cast-on stitch.
- Repeat: Continue wrapping the yarn around the needle and pulling through until you have the desired number of stitches on your needle. This number should match the pattern you’re following. Do you like knitting? Read our article about Knitting for beginners.
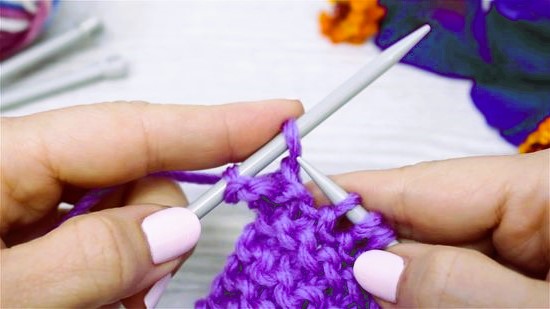
Step 2: The Knit Stitch
Once you’ve cast on your stitches, it’s time to start knitting with the basic knit stitch:
- Hold the Needles: Hold one knitting needle in each hand. The needle with the cast-on stitches is in your left hand, and the empty needle is in your right hand.
- Insert the Right Needle: Insert the right needle from left to right into the first stitch on the left needle.
- Wrap the Yarn: Bring the working yarn (the yarn attached to the ball) behind the right-hand needle from right to left.
- Pull Through: Use the right-hand needle to catch the yarn and pull it through the stitch on the left-hand needle.
- Slide Off: Slip the original stitch off the left-hand needle. You’ve now created a knit stitch on the right-hand needle.
- Repeat: Continue inserting the right needle into the next stitch, wrapping the yarn, pulling through, and sliding off the old stitch until you’ve knit all the stitches on the left-hand needle.
Step 3: Purl Stitch
The purl stitch is another basic knitting stitch that creates a different texture. Here’s how to purl:
- Hold the Needles: Hold one knitting needle in each hand as you did for the knit stitch.
- Insert the Right Needle: Insert the right needle from right to left into the first stitch on the left needle.
- Wrap the Yarn: Bring the working yarn to the front of your work, between the two needles.
- Pull Through: Use the right-hand needle to catch the yarn and pull it through the stitch on the left-hand needle.
- Slide Off: Slip the original stitch off the left-hand needle. You’ve created a purl stitch on the right-hand needle.
- Repeat: Continue inserting the right needle into the next stitch, wrapping the yarn, pulling through, and sliding off the old stitch until you’ve purled all the stitches on the left-hand needle.
Step 4: Binding Off
Once you’ve completed your knitting project, it’s time to bind off (or cast off) to secure your stitches:
- Knit the First Two Stitches: Knit the first two stitches using the knit stitch method.
- Lift the First Stitch Over: Insert the left-hand needle into the first stitch on the right-hand needle and lift it over the second stitch and off the needle. You’ve bound off one stitch.
- Knit the Next Stitch: Knit the next stitch on the left-hand needle.
- Repeat Binding Off: Repeat the process of lifting the previous stitch over the current stitch and knitting the next stitch until you have one stitch left.
- Cut the Yarn: Leave a tail of a few inches and cut the yarn. Thread the yarn through the last stitch and pull tight to secure.
Step 5: Finishing
Once you’ve bound off, you’ll have a completed knitting project. Use your yarn needle to weave in any loose ends and trim excess yarn. Your project is now ready to be worn, displayed, or given as a thoughtful gift.
Conclusion: Embrace the Craft of Knitting
Knitting is a rewarding and creative hobby that offers endless possibilities for making beautiful and functional items. As you practice and gain experience, you’ll discover new stitches, patterns, and techniques that will allow you to create even more intricate and personalized projects. Whether you’re knitting for relaxation, as a creative outlet, or to craft handmade gifts, mastering the basics is the first step on your knitting journey.
For further knitting resources and inspiration, consider exploring Minecraft’s Official Website. While these websites primarily focus on the popular game, they can provide a unique source of creativity and ideas for knitting projects inspired by the Minecraft universe. Happy knitting!